I remember the first time I tried to improve my video sound and realized audio mattered more than I thought. I picked up affordable gear and learned fast that a good microphone can change the quality of a film project.
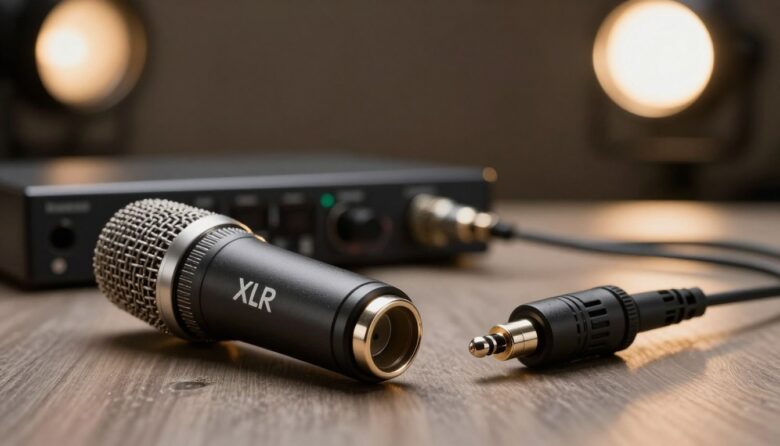
Choosing the right connection is the first step. Whether you plug into a camera with a 3.5mm jack or run a balanced cable into a recorder, the signal and connectors shape the final level and clarity.
I often use Rode products when I test setups because they work well with cameras like the Canon 70D, 80D, Panasonic GH5, and Sony a6000 series. Those examples show how a simple stereo line or an unbalanced jack can pick up interference from lights or power sources during a shoot.
As a filmmaker, I focus on reliable cables and the right input for the job. That choice is one of the best investments I made to improve my work and reduce noise on set.
Key Takeaways
- Good audio gear lifts your video quality more than better visuals alone.
- Pick the connector and cable type that match your recorder and camera inputs.
- Balanced connections reduce noise and interference during a shoot.
- Rode models with 3.5mm jacks work well for many mirrorless cameras.
- Think long term: reliable connectors and proper cables pay off in consistency.
Why Audio Quality Matters for Your Productions
Strong audio design is what makes stories feel immediate and alive. I find that good audio lifts a project the way color grading does for picture. Clean capture helps your audience connect with dialogue and emotion.
I always prioritize a clear signal path on set because even a great microphone cannot fix poor cables or a noisy input. Reducing background noise is constant work, and balanced cables often make the biggest difference in level and clarity.
You don’t need to spend a fortune to get pro results. There is a wide line of affordable gear that gives excellent sound for run-and-gun video work. The answer to better production value often starts at the inputs and the choice of mics.
“Focus on clear inputs and consistent cables — your edit will thank you.”
| Device | Typical Input | Primary Benefit |
|---|---|---|
| Mirrorless Camera | 3.5mm jack | Compact, convenient for fast shoots |
| Field Recorder | xlr balanced line | Lower noise, higher headroom |
| Lav or Boom | Mic inputs / cable | Close capture, consistent dialogue level |
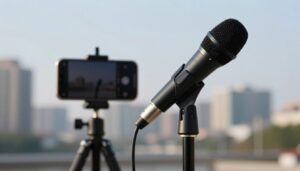
Understanding the 3.5mm Shotgun Mic Experience
Working with compact cameras taught me how much portability shapes on-set audio choices. Most mirrorless and DSLR bodies, like the Sony a7S series, favor a 3.5mm jack to keep rigs light and fast to deploy.
The Convenience of Compact Cameras
I like how a small microphone and a simple connector let me move quickly between shots. For run-and-gun work, that minimal setup is a real advantage.
Limitations of Unbalanced Signals
But there are trade-offs. The unbalanced connection common to 3.5mm cables can pick up interference and raise noise. That affects the signal and the clean audio level you capture.
- Watch cable length: Long leads often mean signal degradation.
- Stereo design: Many 3.5mm mics aim for stereo, which may not suit every job.
- Ruggedness: These connectors lack the robust build of professional XLR inputs.
Ultimately, the answer is to weigh speed against the level of quality you need. I balance portability with proper cables and inputs to get the best sound for my video work.
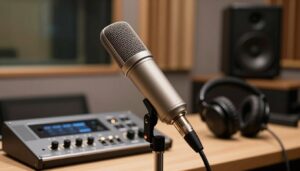
The Professional Edge of an XLR vs 3.5mm Shotgun Mic
When projects demand broadcast reliability, I switch gear and trust industry-standard connections.
Professional cameras like the Sony FS7, Canon C100, and Panasonic EVA1 have those inputs for a reason: they deliver broadcast-quality audio and consistent level. Using a robust connector and balanced cables reduces noise and keeps the signal clean on long runs.
Why Broadcast Standards Rely on XLR
Why Broadcast Standards Rely on XLR
I rely on the Sennheiser MKE 600 when I need a step up from run-and-gun setups. Its xlr connector and durable design handle interference that smaller jacks often pick up.
Key benefits I see on set:
- The primary difference is a broadcast-quality signal that holds up under heavy processing.
- Balanced cables and a solid xlr input give consistent audio level and lower noise.
- Industry-standard connectors mean reliable results in crowded or high-stakes shoots.
“By using robust connectors and balanced line inputs, you preserve signal integrity where it matters most.”

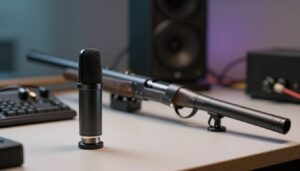
Managing Connections and Adapters for Your Camera
Adding a professional adapter to a mirrorless body often shifts the balance between mobility and clean audio. You gain a robust input and lower noise, but you also increase rig weight and cable complexity.
For GH5 users, Panasonic’s XLR adapter box is a great option because it mounts to the hot shoe and draws power from the camera. That setup gives a clean line input without needing a separate power source.
Using XLR Adapters for Mirrorless Bodies
I use the Sennheiser MKE 600 with an external recorder or directly into my Canon C100 Mark II when I need the best audio quality. The adapter and proper cables preserve signal level and reduce interference on long runs.

The Trade-off of Weight and Bulk
Managing weight is a real thing when you mount an adapter and extra cables. Your camera becomes heavier and less nimble for handheld work.
If you shoot all day, that added bulk affects stability, battery life, and how quickly you can move between setups.
When to Choose Portability Over Power
When discretion or speed matters, a smaller connector and lighter microphone are often the better answer. Portability wins for run-and-gun documentary work or solo operators.
- Use adapters when you need low noise and consistent level on long cable runs.
- Choose a compact setup when you must move fast or stay unseen.
- Decide whether the extra signal protection is worth the added bulk for your shoot.
“Decide if the audio gain from a professional connection outweighs the added weight in your kit.”
Conclusion
Deciding on the right input can be the best investment you make for clearer tracks. I weigh the needs of each shoot and the gear I own before I pick one connector or another. Choose the input that fits your workflow and budget.
Good audio comes from choices that protect the signal and cut noise. The real difference in your final video is often about cable quality and a reliable connection, not just the microphone brand.
I find that compact mics shine for speed, while a durable XLR setup brings broadcast-level quality for critical work. Test your setup with your camera and practice until you know the sound you expect.
Happy shooting — invest where it counts, and your edits will reflect the time you spent on proper audio.
FAQ
What’s the main practical difference between an XLR shotgun mic and a 3.5mm shotgun mic?
The biggest practical difference is the signal path and reliability. One uses a balanced connection with locking contacts and often needs phantom power, which reduces noise and interference for cleaner recordings. The other plugs into a camera or recorder with an unbalanced jack that’s compact and convenient but more prone to hiss and handling noise. I recommend the balanced option for interviews and broadcast work, and the small-jack choice when space and weight matter.
Can I use an adapter to connect a balanced microphone to my mirrorless camera?
Yes. There are adapters and audio interfaces that accept a professional connector and output to a camera’s small input. These adapters often include preamps and padding switches so levels match your camera. Keep in mind added weight and bulk, and check for compatible phantom power if your microphone needs it.
Will I notice a big sound quality difference on my YouTube videos?
You likely will. A balanced connection and better preamps give clearer dialogue, better dynamic range, and less background hum. For casual vlogs the compact jack might be fine, but for tutorials, short films, or client work I find the professional connection elevates perceived production value.
Do balanced connections really reduce interference outdoors?
Yes. A balanced line cancels out electromagnetic interference picked up along the cable. That matters on location shoots near radio towers, generators, or long cable runs. Using good shielded cables and proper connectors further minimizes problems I’ve seen with cheaper unbalanced setups.
What are the trade-offs in weight and portability when choosing an audio interface or adapter?
Adding an interface brings better gain control, pads, and phantom power but adds size, mount points, and battery drain. I use a lightweight adapter for run-and-gun work and a full interface for interviews or multi-track sessions. Choose based on how long you’ll record and how much gear you want on the camera rig.
How do input levels differ between camera jacks and professional inputs?
Cameras expect consumer-level signals and often have weaker preamps than audio recorders or mixers. Professional inputs handle higher headroom and offer cleaner gain staging. If you push a camera’s input too hard, you’ll clip; if you under-drive it, you’ll introduce noise. I use a preamp or pad when connecting high-output mics to avoid that.
Do I need phantom power for every shotgun microphone with a pro connector?
Not every one, but many do. Some models run on internal batteries, others require +48V phantom power delivered through the connector. Always check your microphone’s spec. If it needs phantom, make sure your interface or mixer provides it or you’ll get no output.
Are there compatibility concerns with stereos or multiple microphones?
Yes. Small jacks typically handle one channel per input and aren’t designed for multi-mic setups. Professional rigs with balanced connectors and multi-channel recorders let you manage levels per mic and keep each channel clean. For stereo field recording I prefer dedicated inputs on a recorder or mixer.
How should I choose when to prioritize portability over professional features?
I prioritize portability when I’m solo, moving quickly, or filming long hours with limited crew. I choose professional connections when sound quality is critical or when I can afford the extra gear. Consider your content goals: higher production standards justify the bulk; casual runs don’t.
Will adapters introduce noise or signal loss?
Poor-quality adapters can degrade signal or introduce grounding issues. High-quality adapters and short, shielded cables usually preserve sound. When I must adapt between connectors, I use reputable brands and test levels before important shoots to avoid surprises.

Caleb Hayes is a field recording specialist and audio technology writer focused on shotgun microphones, sound directionality, and on-location capture. He shares practical techniques and gear insights to help creators record clean, focused audio in real-world environments, from filmmaking to documentary production.