I believe that the key to capturing a natural voice starts with the way a microphone handles sound across the audible range.
I check technical specs closely, especially the range that covers 20Hz to 20kHz, so I know the device will catch low warmth and clear highs.
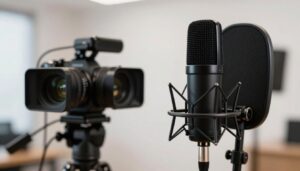
When I choose a shotgun microphone for a dialogue shoot or studio session, I focus on how the interference tube and capsule design shape pickup and reduce unwanted noise.
That choice matters for film sets, boom work, and run-and-gun setups with cameras. It also guides how I pick budget options or pro-level units and whether I need shock mounts, wind protection, or extra power.
Key Takeaways
- Understanding the device’s range helps preserve natural voice tone.
- Interference tube design affects pickup and off-axis sounds.
- Check specs for full 20Hz–20kHz coverage when possible.
- Match microphone choice to your recording environments and camera setup.
- Budget options can work well with proper mounts and wind control.
Understanding the Basics of Shotgun Microphones
I often start by looking at the microphone’s shape and construction to understand how it will capture a voice on set. The long, narrow body tells me a lot about directionality and how well the device will focus on a source while ignoring room noise.
Defining the Interference Tube
The interference tube is the slender section along the front of the device. It contains slots that route arriving waves so side sounds cancel through phase interaction.
This design is what helps the mic keep a clean pickup from the front and reject off-axis noise from the sides and back.
How Directionality Works
Directionality depends on the tube and capsule working together. Pointing the device at a speaker keeps levels steady even if they shift their angle slightly.
- The tube cancels side waves using phase differences.
- I rely on this when I record near fans or room noise.
- Many cameras accept these microphones, so they work for both studio and field shoots with boom setups.
“Understanding how these elements interact is the first step toward professional audio quality.”
Why Shotgun Mic Frequency Response Matters for Natural Voice
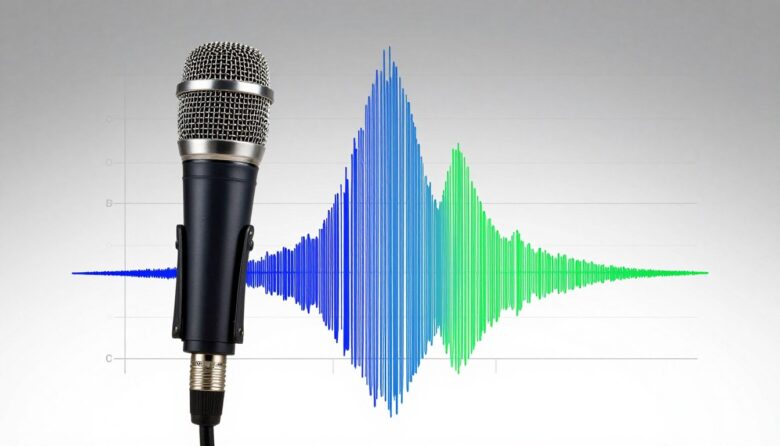
I care most about how a microphone treats the full audible band, because that shapes whether a voice sounds honest or colored.
A flat frequency response keeps the timbre true. That means vowels stay warm and consonants stay clear without unwanted boosts or dips.
I also watch the low-end roll-off. A gentle high-pass can cut rumble from wind or HVAC during on-location recording and keep dialogue intelligible.
The usable range for a pro-grade unit usually spans 20Hz to 20kHz. That gives depth to male and female voices and the air that makes speech feel real.
- Flat pickup preserves natural audio quality for film and podcasts.
- Controlled bass reduces noise while keeping presence and level consistent.
- Right choices in the interference tube and mic placement help maintain clarity on boom or camera setups.
“Control the tonal balance, and the voice will sit naturally in the mix.”
Evaluating Polar Patterns and Off-Axis Rejection
When I judge polar patterns, I look for how sharply a design trims sounds from the sides.
Good side rejection is vital for clean recording. The polar pattern determines how well a device keeps unwanted noise away from the source. I check the off-axis behavior to see how tonal color changes as the angle shifts.
Comparing Supercardioid and Hypercardioid Designs
Supercardioid offers focused pickup with moderate side lobes. It works well when you need directionality but still want forgiving placement.
Hypercardioid narrows the pickup angle more. I prefer it in noisy rooms because it isolates the voice better and reduces bleed.
- The interference tube and capsule shape the pickup angle and off-axis tone.
- Check off-axis response charts to judge how sounds color as you move away.
- Effective side rejection is why professionals use these designs on film and live streams.
| Pattern | Main Advantage | Best Use |
|---|---|---|
| Supercardioid | Balanced focus with some side sensitivity | Run-and-gun shoots, versatile setups |
| Hypercardioid | Stronger isolation, narrower angle | Noisy rooms, tight dialogue capture |
| Cardioid | Wider pickup, natural off-axis tone | Controlled studio environments |
The Role of Self-Noise in Quiet Recording Environments
Low-level electronics hiss can turn an intimate take into a noisy mess if I ignore it. Self-noise is the internal hiss made by a device’s preamp and electronics, and it becomes obvious during soft reads.
I always look for an A-weighted self-noise under 15 dB so my tracks stay clean. In a quiet booth even a small hiss makes it hard to reach broadcast quality.
The stability of a mic’s frequency response matters when I push gain to capture distant sources. If the tonal balance shifts at high gain, the voice will sound thin or harsh.
Practical steps I use include closer placement and proper gain staging. Mounting the shotgun microphone on a boom brings the source nearer, so I can lower preamp gain and cut the audible hiss.
“Choosing low self-noise and using good placement keeps intimate audio usable and free of distracting hiss.”

- Tip: Target <15 dB A-weighted for voice work.
- Use a boom to lower gain and improve signal-to-noise.
- Verify the device keeps a stable response when driven hotter.
Powering Your Microphone for Consistent Performance
Power stability is one of the quiet heroes that keeps a recording consistent from take one to take ten.
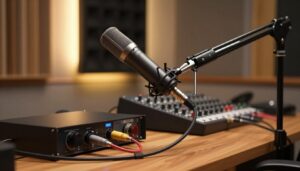
Most professional shotgun microphones need 48V phantom power, usually supplied by an audio interface, mixer, or some camera inputs. That stable supply keeps the capsule sensitive and the audio quality reliable.
I also carry a battery-powered option for location shoots when phantom power is not available. A battery backup saves a session when outlets or adapters fail.
The choice between battery and phantom often comes down to budget and workflow. If I must travel light, a battery option wins. In a studio, phantom is my go-to.
Consistent power delivery prevents shifts in pickup and avoids extra noise when I push gain. For budget models, I check if they support both phantom and internal batteries to maximize flexibility.
“Keep power steady, and the microphone will keep the sound true to the source.”
| Power Type | Main Advantage | Best Use |
|---|---|---|
| 48V Phantom | Stable, low-noise supply for pro gear | Studio, mixers, audio interfaces |
| Internal Battery | Portable, no external gear needed | Location shoots, run-and-gun setups |
| Dual Support | Flexibility between studio and field | Budget-conscious creators needing versatility |
Essential Mounting Techniques for Professional Audio
Good mounting turns a solid recording into a professional one by removing handling and surface noise. I treat mounting as part of the signal chain, because a poor mount ruins otherwise great audio.

Utilizing Boom Arms for Isolation
I mount my shotgun microphone on a high-quality boom arm to keep the source steady and reduce desk vibration. A boom lets me place the mic close to the mouth while staying out of frame for camera work.
Tip: Pair the boom with a Rycote Lyre shock mount to block handling noise from traveling up the pole into the capsule.
Studio Arm Setup Tips
A studio arm gives precise control of angle and reach. I position the microphone so the pickup lobe points at the mouth, keeping consistent levels across takes.
Small adjustments to height and tilt can improve clarity and preserve frequency response and tonal balance during longer sessions.
Desk Stand Considerations
When a desk stand is the only option, angle the mic toward the sound source and add a small shock mount or isolation pad.
Watch for desk noise. Even with good mics and patterns, surface thumps change the recorded level and quality.
“Proper mounting is as important as the microphone itself; it directly impacts clarity and the usable range of your tracks.”
| Mount Type | Main Benefit | Best Use |
|---|---|---|
| Boom Arm + Shock Mount | Strong isolation from handling and desk noise | On-location, streaming, film boom work |
| Studio Arm | Precise positioning and repeatable angle | Podcasting, voiceover, controlled studio sessions |
| Desk Stand with Pad | Compact and simple; needs isolation add-ons | Home desks, casual recording, tight spaces |
Managing Environmental Factors and Wind Interference
I always scout the recording site first to spot any drafts, vents, or reflective walls that can ruin a clean take.
Wind is the biggest culprit outdoors. A high-quality foam windscreen or a furry deadcat cover stops low-end rumble and preserves voice detail.
When I record outside, the shotgun microphone is more exposed to gusts that mask subtle sounds. Using a windshield keeps the pickup steady and the overall audio quality high.
I also move the setup away from hard walls and glass. Those surfaces throw back echoes and change the sound in ways that EQ can’t always fix.
Shielding from drafts helps, too. I position the microphone out of direct air paths and use temporary barriers when I need to.
“A small weather shield and good placement save hours of cleanup and keep the take usable.”
| Issue | Fix | When to Use |
|---|---|---|
| Wind rumble | Furry deadcat or foam windscreen | Outdoor shoots, windy locations |
| Room echo | Move mic from reflective surfaces; add blankets | Small rooms, glass walls |
| Drafts from vents | Reposition or block vent; use directed mount on boom | Indoor locations with HVAC |
- Tip: Test a short recording and listen on headphones before rolling full takes.
- Use a boom to keep the microphone near the source while staying out of frame for the camera.
Selecting the Right Microphone for Your Specific Budget
For many creators, the smartest buy pairs solid specs with hands-on features like monitoring and filters. I pick gear based on real use: what I record, where I place the device, and the background noise I expect.
Entry-level options like the SYNCO D1 ($129) and the Rode VideoMicro suit camera-mounted work and run-and-gun shoots. They keep weight low and still offer decent pattern control for on-camera pickup.
Mid-range choices such as the SYNCO D30 ($159) and D2 ($199) add monitoring jacks, low-cut filters, and very low self-noise. These give cleaner audio and extra control when I need it.
Pro and film gear — Sennheiser MKH416, Neumann KMR 81i, Shure VP89M, Rode NTG5 — deliver unmatched side rejection, high SPL handling, and natural sound for dialogue and location work.
| Model | Price | Key Feature | Best Use |
|---|---|---|---|
| SYNCO D1 | $129 | Hypercardioid, dual power | Beginners, camera work |
| SYNCO D30 | $159 | Monitoring jack, low-cut filter | Indie shoots, vloggers |
| SYNCO D2 | $199 | 12 dB self-noise, 20Hz–20kHz | Podcasts, voiceover |
| MKH416 / NTG5 / KMR 81i | Varies | Pro side rejection, low noise | Film, studio, high-end location |
“Always match self-noise, pattern, and power options to your recording environments.”
Conclusion
, Picking the right recording tool can change how every take sounds and feels. I believe one good choice in gear and placement lifts audio quality fast.
I hope this guide helped you see how frequency and pattern affect natural voice, and why self-noise matters during quiet reads. Match your camera setup, power source, and mounting to the space and budget you have.
Remember: proper mounting and a good windscreen protect the source as much as the microphone itself. Try different angles and boom positions, compare sounds, and share what works so others can learn with you.
FAQ
What is meant by the term "frequency response" for a shotgun microphone and why does it matter for natural voice?
I mean the range of tones a microphone captures and how evenly it records them. A flat range preserves natural timbre while tailored curves can enhance presence or warmth. For voice work, I look for a balance that keeps intelligibility without boosting sibilance or muddiness.
Can you explain the interference tube and how it affects directionality?
The interference tube uses slots to cancel sounds from the sides, which narrows the pickup angle. I find this helps isolate a speaker in noisy environments, but it also makes placement and aiming more critical to avoid color changes when the source moves off-axis.
How does directionality work and what should I watch for on set?
Directionality depends on capsule design and the tube. I pay attention to off-axis coloration and lobing at higher tones. On set, I keep the element pointed directly at the source and use booms or mounts to maintain consistent angle as people move.
Why does tone shaping matter for capturing a natural-sounding voice?
Tone shaping controls which parts of the spectrum are emphasized. I prefer models that gently boost presence around the midrange without overemphasizing sibilance. That preserves clarity while avoiding an overly bright or thin sound.
How do polar patterns and off-axis rejection affect dialogue recording?
Different patterns reject ambient noise differently. I choose a design that gives tight off-axis rejection when I need isolation, but I avoid extremes that introduce odd tonal shifts for sounds outside the main axis.
What are the practical differences between supercardioid and hypercardioid designs?
Both offer narrow pickup, but hypercardioid typically has a slightly narrower frontal lobe and a small rear lobe. I consider placement: supercardioid suits controlled fields, while hypercardioid can give better reach at the cost of some rear pickup.
How important is self-noise in quiet recording environments?
Very important. I choose low self-noise units for whisper-quiet scenes or ASMR because hiss becomes audible in silence. For louder environments, this is less critical, but I still avoid noisy preamps and devices.
What power options should I consider to keep performance consistent?
Many professional units use 48V phantom power, which I prefer for stable output and low noise. Some camera-mounted models run on batteries; I check voltage stability and switching noise before a shoot.
What mounting techniques help reduce handling noise and interference?
I use shock mounts and boom poles to isolate vibration. Proper cable strain relief and a balanced rig reduce rumble. When possible, I keep the microphone off the camera to avoid mechanical noise transfer.
How do boom arms, studio arms, and desk stands compare for isolation and flexibility?
Boom arms give reach and mobility on location; I rely on them for film and ENG work. Studio arms offer stable desktop placement for podcasts with good isolation when paired with a shock mount. Desk stands are compact but transmit more desk noise unless well isolated.
How do wind and environmental factors change what I should use outdoors?
Wind can wreak havoc on sensitive capsules. I always use a foam cover plus a blimp or furry windshield for strong gusts. Also, I mind temperature and humidity, which affect electronics and can change tonal character slightly.
What should I prioritize when choosing a model on a budget?
I balance reach, noise floor, and build quality. I recommend prioritizing a low-noise preamp and a robust mount over fancy top-end specs. Brands like Sennheiser and Rode offer solid affordable options that perform well for voice.
How do I match a microphone to different cameras and recorders?
I check connector type, required power, and output level. If a recorder lacks phantom power, I use a battery-powered adapter or an inline preamp. Also, consider weight and balance for camera mounts to avoid strain.
Are there maintenance tips to keep performance steady?
Yes. I keep the grille and windshield clean, store gear in a dry case, and service connectors regularly. Periodic checks for loose elements or corrosion prevent sudden failures on location.
Can I use a single microphone for both on-camera and studio voice work?
You can, but I adapt accessories. For on-camera use I prioritize compactness and shock isolation; for studio work I add high-quality preamps and pop protection. The same tool can work across roles if I change the setup.

Caleb Hayes is a field recording specialist and audio technology writer focused on shotgun microphones, sound directionality, and on-location capture. He shares practical techniques and gear insights to help creators record clean, focused audio in real-world environments, from filmmaking to documentary production.