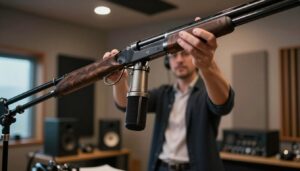
I’ve spent many years learning how to capture clear, directional sound for film and podcast work. A good shotgun microphone can isolate a subject and lift your production value, but a persistent hiss or static can undo that effort.
On this page I show practical steps to lower the ambient floor and refine gain settings. I explain how simple checks—like testing the microphone in a quiet room—reveal whether the issue is gear, placement, or the recording chain.
My approach focuses on real-world fixes that improve audio quality for interviews, location work, and studio sessions. I share the techniques I use with different mics so you can stop battling background noise and get clean recordings that stand out.
Key Takeaways
- Start by testing your microphone in a quiet space to find the background noise floor.
- Small changes in placement and gain often remove the hiss without heavy processing.
- I recommend checking the whole signal path—cables, preamps, and settings matter.
- Use directional mics and isolation techniques to reduce ambient interference.
- Consistent testing over the years builds the skills needed for clean recordings.
Understanding Shotgun Microphone Mechanics
I’ll explain how the physical design of directional microphones shapes what they capture on set.
Interference tubes determine directionality and much of the frequency response. The longer the tube, the more the device favors sounds from the front and the better it performs at distance.
I found in my years of production work that tube length directly affects how well the microphone isolates a voice from ambient noise. The diaphragm is sensitive to air movement, so proper handling and wind protection matter.
Interference Tube Technology
The tube creates phase cancellations that reject side sounds. That is why many experts call this design ideal for film and location recording.
Polar Pattern Characteristics
Most of these mics use a lobar or supercardioid pattern to focus on a single source. That focused pattern helps capture clean sound for interviews and distant sources.
| Tube Length | Directionality | Distance Performance | Common Applications |
|---|---|---|---|
| Short | Wide | Near-field | Studio, close interviews |
| Medium | Focused | Mid-range | Run-and-gun production |
| Long | Highly lobar | Far-field | Film sets, boom operation |
Troubleshooting Shotgun Mic Noise and Interference
I begin by checking the entire signal chain when an unwanted hiss or static appears. I look at cables, preamps, and system drivers to rule out a device or setting that is adding interference.
If the problem persists, I move the microphone away from routers, phones, and power supplies. In my years of work I’ve found proximity to computers and power lines often causes background noise that mimics a bad mic.
Using a dynamic microphone like the Shure SM7B can help in loud places. That kind of microphone yields a tighter pickup and often reduces the amount of ambient interference you hear in the recording.
- Swap cables and test a different input to check shielding.
- Move the setup to another room to see if the background disappears.
- Disable wireless devices nearby and retest for reduced interference.
| Check | What to do | Expected result |
|---|---|---|
| Cable and connectors | Replace XLR or USB cable; try another port | Cut static if shielding was the issue |
| Environment swap | Record in a different room | Background gone if room caused it |
| Wireless devices | Power off phones, routers nearby | Lower intermittent hum or bursts |
| System settings | Update drivers and check gain staging | Stable, clean level with no static |
Optimizing Gain and Input Levels
I make gain control the first check before any take. A clean session starts with correct input levels on your interface. Small adjustments at this stage protect the source and keep the recording usable without heavy fixes later.
Setting Proper Headroom
Aim for peaks between -12 dB and -6 dB on your meters to avoid clipping and audible distortion. I watch levels while the talent speaks at full volume for a reliable reference.
The gain knob on your audio interface converts the microphone’s analog signal into digital. Adjust it so the mic does not amplify background noise into static. If the audio jumps when the performer moves closer, lower the gain right away.
There is no universal number for gain because each shotgun microphone and interface pair needs a different setting. In my years of work I learned to trust the meter and my ears more than presets.
- I tell students: set gain first, then set volume in software.
- Monitor for occasional peaks and keep headroom for unexpected dynamics.
- Maintain consistent settings to capture the highest possible quality.
| Scenario | Adjustment | Expected Result |
|---|---|---|
| Close speaker | Reduce gain 3–6 dB | No clipping; clear voice without distortion |
| Quiet room, distant source | Increase gain slowly; monitor meters | Good level with minimal amplified ambient noise |
| Intermittent spikes | Set limiter or lower input level | Controlled peaks; safer recording chain |
Managing Physical Connections and Cables
Before changing settings, I verify that every physical connection is seated and shielded.

Start with simple checks. I inspect cables for wear and push connectors fully into the input. A loose cable often creates a persistent buzz and weak signal.
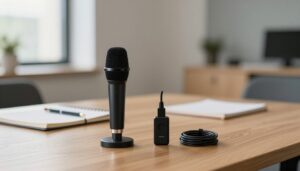
I keep condenser microphones powered with 48V phantom power when they use XLR. USB microphones go straight to the computer — never through an unpowered hub — to preserve the audio path.
I avoid the 2.4 GHz band in crowded areas because Wi‑Fi and Bluetooth devices can cause interference. I also route cables away from power strips and major devices to cut stray hum.
- I use high-quality, shielded cables to protect the signal.
- I confirm the mic is on the correct interface input and that power is applied if needed.
- If static appears in my headphones, I reseat the cable and try a different lead.
These small steps, learned over years in the field, solve most connection issues before changing any settings on the system.
Environmental Factors Affecting Audio Quality
Small changes to the recording environment produce large improvements in clarity and voice presence. The room you record in sets the baseline for every take. Address it first and you cut editing time later.
Acoustic Treatment Basics
Absorb reflections. Place rugs, curtains, or foam panels on hard surfaces to reduce echoes and unwanted reflections. That helps the microphone capture a more direct voice signal.
- Add a rug under the talent and heavy curtains on windows.
- Use foam panels behind and to the sides of the source for quick gains.
- Consider a portable booth or blanket for small spaces in production work.
Eliminating Mechanical Noise
I turn off fans and AC when I record because moving air creates subtle static the mic picks up. Position the shotgun mic away from windows and appliances to avoid background interference.
Quiet the space first, then adjust settings. In noisy environments I often choose a dynamic microphone as a top option to lower ambient pickup.
Utilizing Noise Gates and Limiters
I rely on gates and limiters to shape the raw audio so edits become faster and clearer. A noise gate trims any sound below a set threshold so quiet background hiss is removed between takes.
Set the gate threshold just above your room floor so it only cuts unwanted hum while leaving speech intact. I tweak attack and release to keep phrasing natural and avoid choppy cuts.
A hard limiter acts as the opposite tool: it caps peaks to stop clipping and audible distortion. I use a limiter to protect the input when a performer suddenly raises volume.
If you work in a DAW, add the gate or plugin on the track or bus. I often place the gate first, then a limiter, and finally light EQ to keep the voice present without artifacts.
- I use a gate to remove static when I’m not speaking into my shotgun microphone.
- Take time to set threshold and test with real takes; small changes matter.
- Apply a hard limiter to prevent distortion during loud moments and protect your interface and meters.
Advanced Software Solutions for Clean Audio
I rely on software to polish what I capture on set and in the studio. A good DAW helps me remove residual hiss and restore presence without harming the voice.
Waves X-Noise is part of my toolkit. It removes steady background hiss from a track while keeping the vocal tone intact.
I use Pro Tools for large projects but also work in Audacity or GarageBand for quick edits. A DAW gives me the power to edit static manually and to apply gates, limiters, and gentle EQ to a shotgun microphone track.
“I use presets to speed the workflow, then tweak settings by ear for the final pass.”
- I rely on plugins to cut residual hiss and restore clarity to my recordings.
- Noise-reduction presets save time, but I always audition changes at real volume.
- Check your input and interface routing so the mic is processed correctly in the system.
Proper Microphone Positioning Techniques
A few inches and a small angle change can transform muddled audio into a crisp recording.
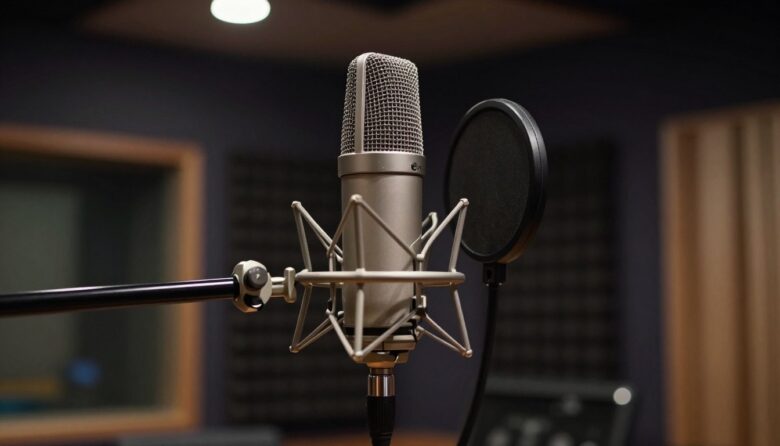
I place my shotgun microphone about 1–3 inches from the subject’s mouth when possible. That distance gives strong voice presence while cutting room reflections and background noise.
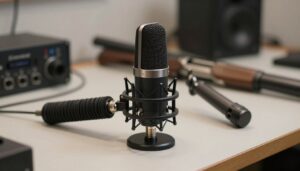
I always mount the mic in a quality shock mount to stop handling vibration from reaching the diaphragm. A pop filter further protects against plosives and keeps the recording clear.
Aim the capsule directly at the sound source for the cleanest capture. Sometimes I move slightly off-axis to get a more natural tone or to tame sibilance and interference from breath or wind.

Outdoors, I never skip a windscreen; it saves takes and prevents wind-related distortion. I monitor audio on good headphones in real time so I can adjust gain, input level, or angle during the session.
- I secure the mic to a shock mount to cut mechanical sounds that ruin recordings.
- Keep the mic close to the source for better quality and lower room impact.
- Place the setup away from reflective surfaces in a studio to reduce echoes.
Routine Maintenance for Longevity
Regular care keeps your microphone performing at peak quality and avoids surprise failures.
I clean my mic body and grille gently after sessions to stop dust from reaching the diaphragm. I use a soft brush and a lint‑free cloth. For delicate parts I lightly blow air from a canister, never touch the capsule directly.
I inspect cables and connectors before every shoot. A worn XLR or USB lead can cause intermittent audio and sudden level drops. When I spot wear, I replace the cable immediately to protect the rest of the system.
I store equipment in a dry, dust‑free case. That environment shields internal components from humidity and airborne particles that harm long‑term performance.
“A well‑kept microphone is your best insurance against problems on set.”
- I keep a simple maintenance log with dates and settings checks.
- I check diaphragm condition and cable integrity after heavy use.
- I schedule a full service for mics used in the studio or field every 12 months.
Conclusion
This closing summary pulls together the simple checks that keep your recording clean and your spoken sounds natural.
Keep your room controlled and quiet. Watch how air movement affects takes and address vents or fans before you roll.
Check your cables and learn how the microphone’s polar pattern and placement shape the result. Fine‑tune your settings so the source stays clear without heavy editing.
I hope this page helps you feel confident in the studio. Practice these routines and come back for more tips when you need them.
FAQ
How do I reduce hiss and background static in my shotgun microphone recordings?
I start by lowering gain on the preamp and moving the mic closer to the sound source to improve the signal-to-noise ratio. I check cables and connectors for wear, enable any low-cut filter on the microphone or interface, and use a high-quality windscreen or deadcat outdoors. If needed, I apply gentle spectral noise reduction in a DAW like Adobe Audition or iZotope RX.
What is an interference tube and how does it affect sound?
An interference tube is the long part of a directional mic that helps reject off-axis sounds by causing phase cancellation. It boosts forward sensitivity but can introduce comb filtering or tonal changes if I move the mic off-axis or use it too close to reflective surfaces.
How does the polar pattern influence recordings in different rooms?
The polar pattern defines how the microphone picks up sound from various angles. A highly directional pattern focuses on the source and reduces room reflections, but it makes positioning critical. I often switch positions or use acoustic treatment to balance direct sound and ambience.
What steps do I take when I hear intermittent interference or hum?
I inspect power sources and move away from wireless routers, LED lights, and other electronics. I try different cables, change the microphone’s battery or phantom power source, and test the mic with another preamp or recorder to isolate the problem.
How should I set input levels to avoid distortion while keeping headroom?
I aim for peaks around -12 to -6 dBFS on my recorder or interface. That gives me headroom for transients while keeping the level high enough above the noise floor. I use pad switches if available for loud sources and monitor with closed-back headphones.
Why do bad cables cause audio issues, and what should I check?
Damaged or poorly shielded cables introduce hum, crackles, and signal loss. I check for visible wear, loose connectors, and broken solder joints. I replace cheap XLR cables with well-shielded, balanced options from trusted brands like Mogami or Canare.
How can room acoustics make recordings sound thin or boomy?
Hard, reflective surfaces create strong reflections and standing waves that color the sound. I use absorbers and diffusers at first reflection points, add rugs or blankets, and reposition the mic away from parallel walls to reduce boominess.
What methods do I use to eliminate handling and mechanical noise?
I mount the microphone on a shock mount, use a boom pole with proper isolation, and avoid touching stands while recording. I also secure cables with clips so they don’t rub or transmit vibrations into the capsule.
When should I use a noise gate or limiter during recording?
I use a noise gate to cut low-level background sounds during quiet passages, but I set it conservatively to avoid chopping off natural room tails. A limiter protects against unexpected peaks; I engage it if the source has unpredictable dynamics or I can’t raise the sample rate.
Which plugins or software tools help clean up audio after recording?
I rely on spectral editors and restoration plugins like iZotope RX for broadband hiss and clicks, Waves X-Noise for gentle broadband reduction, and FabFilter Pro-Q for surgical EQ. I always work conservatively to avoid artifacts.
Where should I position the mic for the best vocal clarity?
I place the capsule 6–12 inches from the mouth and slightly off-axis to reduce plosives. For on-camera work I angle the tube toward the mouth from above. I test different distances while listening through headphones to find the sweet spot.
What routine maintenance keeps a microphone performing well over time?
I store it in a dry, padded case, remove batteries after use, and periodically clean connectors with isopropyl alcohol. I inspect foam windscreens and replace them when they degrade. Regular checks prevent most long-term issues.
Can wireless devices cause interference with recordings and how do I avoid it?
Yes—wireless routers, phones, and in-ear systems can introduce RF or electrical interference. I put phones on airplane mode, move wireless transmitters away from cables, and switch off lights or devices that cause hum. If problems persist, I use ferrite beads on cables.
What are quick checks to diagnose whether the problem is the mic, cable, or recorder?
I swap components one at a time: connect the mic to a different cable, try a different mic with the same cable, and test each with another recorder or interface. The failing link becomes obvious when the issue follows that item.

Caleb Hayes is a field recording specialist and audio technology writer focused on shotgun microphones, sound directionality, and on-location capture. He shares practical techniques and gear insights to help creators record clean, focused audio in real-world environments, from filmmaking to documentary production.