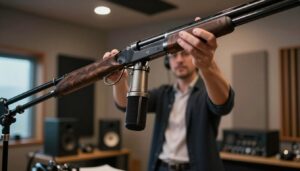
I’ve spent years shooting solo and learning that sound matters as much as the shot. Lucian Thomas summed it up: even the best camera can’t save content when the mic sits too far from the mouth.
In run-and-gun practice, the so-called “shreditor” pushes gear limits to capture clear dialogue in noisy settings. I favor placing the microphone up front, near the subject, to reduce background noise and room echo.
This guide explores the common choice of boom pole vs. on-camera mounting and the reasons professionals pick one way over the other. I’ll cover equipment, handling, and practical situations so you can improve recording quality on location.
Key Takeaways
- Mic placement near the mouth is the fastest route to better dialogue.
- Choosing between a boompole setup and an on-camera mount depends on the situations you face.
- Good handling and practice reduce cable noise and handling problems.
- Shotgun and standard microphones both benefit from forward positioning.
- Equipment choice shapes how people perceive your video’s quality.
Why Professional Audio Quality Defines Your Content
Professional audio quality often separates forgettable clips from memorable productions. I watch audiences tune out when sound is muddy or distant, so I make audio a priority from day one.
https://www.youtube.com/watch?v=FJTyZpJHLNI
The Impact of Background Noise
Lucian Thomas noted how many creators struggle with echoey rooms and constant background noise. In a standard meeting room, reflections from walls can smear the voice and ruin the production.
Some ambiance helps set the scene, but unchecked noise will pull focus from the speaker. I manage the environment to keep unwanted sounds low while preserving natural room character.
Why Clear Dialogue Matters
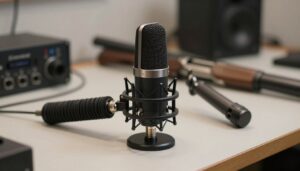
Bringing the microphone closer to the mouth improves vocal clarity and cuts reflections. Clear dialogue keeps viewers engaged and makes your message easy to follow.
- Placement matters: close mic work isolates the speaker.
- High background noise degrades sound and hurts comprehension.
- Good audio management makes dialogue the focal point of any production.
Understanding the Boom Pole vs. On-Camera Mounting Debate
Choosing how to mount your mic changes the way people hear your subject. I often balance mobility and sound quality when I plan a shoot. The Zacuto MicroBOOM sits at the center of that discussion.
The MicroBOOM attaches to the top of your camera or rig and includes a 3.5 mm connector. That makes it ideal for talking-head interviews when a full boom operator isn’t available.
On a busy set, a traditional boom operator still wins for complex shots. But for solo creators, the MicroBOOM acts as an audio buddy, keeping the microphone out of frame while you run the camera.

Using a shotgun mic on a boompole captures better dialogue and gives extended support for varied subject positions. Many people avoid XLR rigs because cables and setup take a lot of time.
“Keeping the mic right in front of you while you handle the camera changes how smooth a recording feels.”
- Cold shoe and NATO rail make mounting fast and secure.
- 3.5 mm output simplifies hookup for solo production.
- Compact support helps when mobility matters most.
The Benefits of Traditional Boom Pole Techniques
Placing the mic inches from a speaker’s mouth changes how every take reads. Traditional long setups give me control over clarity that simple mounts can’t match.
Achieving Optimal Microphone Placement
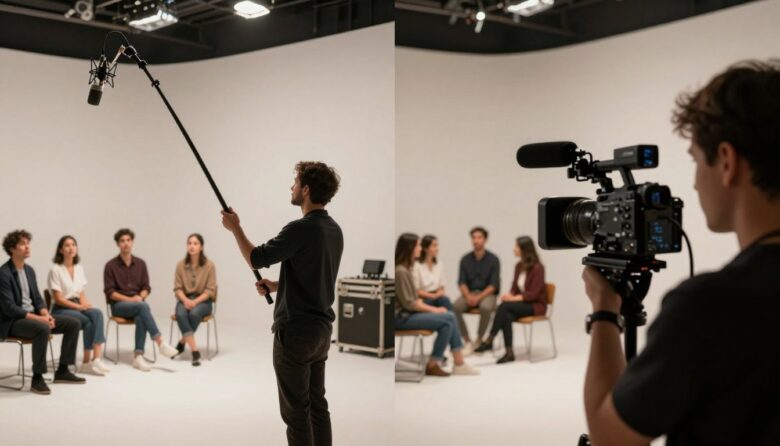
A professional operator keeps the microphone in the right position as the subject moves. This reduces background noise and captures focused sound for each shot.
Long shotgun setups let you stay out of frame while keeping the mic near the mouth. Many crews prefer a clean XLR run for reliability and headroom in post.
- A trained boom operator adapts to subject movement in real time.
- Precise placement lowers room reflections and background noise.
- Using a long mic setup preserves a clean frame while improving dialogue.
| Advantage | Effect | When to Use |
|---|---|---|
| Close placement | Clearer vocal sound | Interviews, dialogue-heavy shots |
| Dedicated operator | Responsive positioning | Moving subjects, complex blocking |
| XLR connectivity | Stable, high-quality feed | Professional multi-mic rigs |
Exploring the Rise of On-Camera Boom Solutions
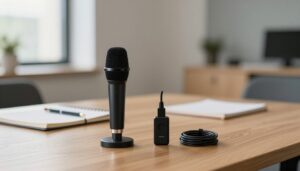
Solo shoots demand gear that keeps audio close without adding weight or fuss. The MicroBoom is one such device, and it changes how I approach quick setups and tight frames.

Portability for Solo Creators
The Zacuto MicroBoom weighs just 5 ounces. Its telescoping carbon fiber design extends from 14 to 35 inches, so I can position the mic nearer the subject without a second person.
Integrated Cable Management
Built-in cable routing keeps wires tidy and stops annoying rustle during recording. That small detail makes a big difference in handling and in post-production.
Carbon Fiber Design Advantages
The carbon construction delivers strength and low weight. I use it for long shoots because it reduces fatigue while keeping the microphone stable and in position.
| Feature | Benefit | Best Use |
|---|---|---|
| Telescoping 14–35 in | Flexible placement | Interviews, meeting rooms |
| 5-ounce carbon body | Lightweight, durable | All-day solo shooting |
| Integrated cable management | Less noise, cleaner setup | Busy sets, run-and-gun |
When to Choose One Method Over the Other
Choosing the right mic setup starts with the size of your crew and the pace of the day.
If you’re a solo creator, I reach for a compact on-camera mount like the MicroBoom for web content. It saves time, stays light, and keeps the shotgun mic close to the subject for clearer dialogue during tight talking-head shots.
When the production grows, things change. For higher-end video and cinema work I recommend hiring an audio technician. A dedicated operator moves the long reach rig to follow people and keep the mic out of the shot for long takes.
In noisy environments, proximity wins. Positioning the mic nearer the subject reduces background noise and improves sound quality more than fancy processing later.
“Match your tool to the situation: use a compact mount for run-and-gun work and a full rig when quality and control matter.”
- Small crews or solo shoots: use a lightweight mount for speed and portability.
- Large shoots or moving subjects: use a long setup with an operator for consistent placement.
- Cinema cameras: plan for an audio tech to protect recording quality.
Essential Gear for Improving Your Sound Recording
Having the right tools in your bag saved a lot of time on set this past season. I relied on gear that stayed light and worked fast so I could focus on the shot and the subject.
The Zacuto MicroBOOM is a standout. It weighs only 5 ounces and uses a carbon fiber design. The telescoping length runs from 14 to 35 inches so you can set the microphone in the right position fast.
I liked that the internal cable exits the bottom as a coiled XLR or 3.5 mm connector for direct hookup to my camera. That cable routing cut rustle and simplified handling during long takes.
For solo creators, this equipment was a real time-saver. Using the cold shoe and NATO rail on top of the camera kept the mic out of the frame and made recording less fiddly.
“Keep the tool in your bag if you do a lot of run-and-gun work — it will improve your audio without hiring extra people.”
- Lightweight carbon build for all-day use
- Adjustable length for precise mic position
- Integrated cable options and clean handling
Conclusion
Good choices start with the needs of the shoot and the size of your crew. Match your method to the scene: smaller teams favor quick, light setups while larger productions get value from dedicated, long-reach rigs.
I found that traditional long setups deliver the most precise placement. A compact mount like the Zacuto MicroBOOM gives solo creators real portability without a big tradeoff in clarity.
Always aim to place the microphone close to the mouth. That single step cuts background noise and makes dialogue clear, faster than any plug-in in post.
Final thought: this guide equips you to pick gear that suits your workflow. Invest wisely, practice handling, and clear sound will lift everything you shoot.
FAQ
What’s the main difference between using a boom pole and mounting the mic on-camera?
I find the key difference is where the microphone sits relative to the subject. A traditional pole lets me place a shotgun mic just out of frame and closer to the mouth, which improves clarity and reduces background noise. An on-camera mount keeps the mic attached to the camera for convenience and mobility, but it usually captures more room sound and less focused dialogue.
When should I prioritize professional audio over convenience?
I always prioritize professional audio when dialogue is the focus—interviews, narrative scenes, or instructional videos. If the conversation drives the content, I prefer techniques that isolate the voice: off-axis placement, directional mics, and an experienced operator rather than relying on a camera-mounted solution.
Can a single creator get good results with on-camera mounting?
Yes. For solo creators, an on-camera solution offers portability and simple setup. I still recommend a quality shotgun or a compact condenser, good windscreens, and careful positioning. For noisy environments or multi-person scenes, though, I switch to handheld lavaliers or call in a boom operator when possible.
How does background noise affect my audio choices?
Background noise changes everything. I move the mic closer to the subject, choose a more directional microphone, and use noise gates or high-pass filters during recording. If ambient sound is loud, a camera-mounted mic usually performs worse than an off-camera placement aimed directly at the source.
Is a carbon fiber boom worth the investment?
For me, carbon fiber gear matters when I need light, stiff poles that reduce operator fatigue and handling noise. Higher-end carbon options also dampen vibrations better than cheap aluminum, which improves the overall signal going into the recorder or camera.
How do I manage cables when using off-camera techniques?
I route XLR or TRS cables along the pole and secure them with small velcro straps. For longer runs, I use quality balanced XLR cables to avoid interference. When possible, I keep connectors away from the camera body to prevent handling noise and simplify setup.
What microphone type should I choose for dialogue-heavy shoots?
I recommend a short to medium shotgun or a hypercardioid mic for most dialogue. Shotguns reject side noise and work well from slightly out of frame. For controlled environments or very close work, lavalier microphones can deliver consistent levels without the need for a pole.
Do I always need a dedicated boom operator?
Not always. I hire a boom operator for scripted productions, multi-subject interviews, or when I need precise mic placement and movement. For run-and-gun shoots or solo vlogs, I handle a compact on-camera setup or use lavaliers to keep things simple.
How should I position the mic to avoid capturing mouth sounds or plosives?
I place the mic slightly above the subject’s mouth and angled down, outside the frame. This reduces plosives and breath hits while keeping the voice natural. Using a windscreen or blimp adds protection against wind and mouth noise during outdoor shoots.
What are quick fixes for poor on-camera audio in post?
I first apply noise reduction and a subtractive EQ to remove rumble or hum. Then I use multiband compression and de-essing to tame sibilance. If dialogue is too distant, carefully applied spectral repair and dialogue isolation tools can help, but they won’t fully replace a better recording on set.

Caleb Hayes is a field recording specialist and audio technology writer focused on shotgun microphones, sound directionality, and on-location capture. He shares practical techniques and gear insights to help creators record clean, focused audio in real-world environments, from filmmaking to documentary production.