I’ve learned the hard way that a clean recording starts before I press record. Getting my gain and level right on the microphone saves me time and keeps my vocals and music sounding professional.
I aim for a peak just under -4dB on my meter. That gives me headroom so the signal stays strong without hitting the distortion threshold. I watch meters in real time and make small adjustments as I record.
I’ll walk you through simple tools and techniques I use to fix audio clipping and avoid common pitfalls. You’ll see how monitoring volume, understanding gain behavior, and using the right gear make a big difference.
Key Takeaways
- Set input gain a bit below -4dB to capture full signal without distortion.
- Monitor meters live to catch level spikes before they ruin a recording.
- Use basic tools and small adjustments to keep vocals and music clean.
- I recommend checking levels at different loudness to save mixing time.
- Quick, consistent habits on set prevent clipping and speed up post.
Understanding the Mechanics of Audio Clipping
I want to keep things simple: knowing how a waveform behaves when you push a signal too hard helps you catch problems before you edit. This short primer explains what you see in your DAW and why overdrive ruins sound quality.
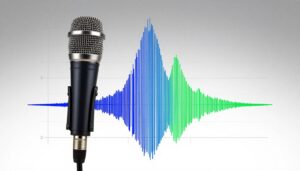
What is a Waveform?
A waveform is the visual shape of a sound. In your daw it shows peaks and valleys that reflect the level of the signal over time.
If the tops and bottoms look squared off, that is a clear sign of clipped audio. A clipped waveform means the equipment has hit its limit and the result is a harsh, fuzzy output.
The Impact of Overdrive
Overdrive causes audible distortion, often in high frequencies, which makes vocals and music lose clarity. Digital and analog systems share this problem.
“A clipped waveform is a damaged signal — fix the gain, not the file.”
- I use gain staging through the chain so the equipment never reaches the maximum level.
- For example, too-hot input will create a clipped audio file that lacks detail and quality.
How to Prevent Audio Clipping During Recording
Before I hit record, I run a quick check of meters, mic placement, and room noise. This saves time and keeps takes usable.

Performing Test Recordings
I always record a short test to watch my levels in the green. A few spoken lines and a loud phrase show me peaks that could cause clipped audio.
Maintaining Consistent Microphone Distance
I keep the microphone at a fixed distance during takes. That steadies volume and reduces sudden jumps in the incoming signal.
Utilizing Backup Tracks
I record a secondary track at a lower level as insurance. If the main file hits the threshold, the backup often saves the take.
- Do a test pass to ensure levels stay in the green.
- Set one mic spot and keep it for each take to avoid volume drift.
- Use a compressor and limiter to manage peaks and protect the threshold.
- Keep a safety track recorded 6–10 dB lower than your main level.
| Action | Why it helps | Quick setting |
|---|---|---|
| Test recording | Reveals peaks on meters and shows real waveform behavior | Speak and sing at loudest expected level |
| Consistent mic distance | Keeps volume stable and reduces sudden level spikes | Mark position on the stand or use a boom arm |
| Compressor + limiter | Controls dynamic range so loud peaks don’t exceed threshold | Threshold: -6 to -3 dB, moderate ratio, fast attack |
| Backup track | Provides a clean take if the main track clips | Record 6–10 dB lower than main input |
“Set your meters before you set your ego.”
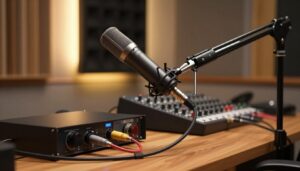
Essential Tools for Managing Signal Levels
I rely on a compact set of tools to keep signal levels in check while I record. A limiter lets me set a clear threshold in decibels so the incoming signal never passes the maximum level for the take.
Most modern DAWs include compressor and limiter plug-ins that handle dynamics during tracking and mixing. I load them on my channel and watch meters while I speak or play music.

I check the whole equipment chain to make sure no single device is boosting the gain and causing distortion. For example, setting a limiter to a specific decibel setting tames peaks and keeps the final audio file clean.
“Use a limiter to hold peaks under the threshold, and tune your compressor for natural dynamics.”
- I use a limiter to set a fixed ceiling so the incoming signal stays controlled.
- I favor compressor + limiter plug-ins in my workflow to fix audio clipping issues fast.
- Regular checks of gain staging across analog and digital gear save time in post.
Techniques for Restoring Distorted Audio
When a take ends up harsh and unusable, there are software tools that can often breathe life back into the file.
I often reach for a de-clipper first. CrumplePop ClipRemover works with Audacity, Adobe Audition, and Pro Tools to repair clipped audio by reconstructing the waveform.
Audacity’s Clip Fix can also help. It interpolates missing waveform parts to reduce distortion and make the file more usable for mixing.
Using De-Clipper Software
Start by loading the damaged file into your DAW and solo the section with peaks. Set the de-clipper’s threshold to catch the worst parts without altering clean passages.
I then nudge volume and threshold settings, and run a gentle compressor after the de-clipper to smooth peaks. This combo often restores vocals and music to a natural sound.
“A good de-clipper plus careful threshold work can save takes you thought lost.”
- I use CrumplePop ClipRemover when live recordings hit peaks and my vocals show obvious distortion.
- Adjusting threshold and volume in the DAW is key to rebuilding a usable audio file.
- Pairing a de-clipper with a compressor or limiter helps tame remaining peaks and restore consistent volume.
- Adobe Audition’s diagnostics save me time on complex restorations and batch repairs.
| Tool | Best use | Quick setting |
|---|---|---|
| CrumplePop ClipRemover | Restore clipped passages from live recordings | Threshold: auto, tweak to taste; process in short segments |
| Audacity Clip Fix | Reconstruct small clipped regions for single-file fixes | Strength: low–medium; preview before apply |
| Adobe Audition | Advanced diagnostics and batch repair of damaged waveform | Use spectral view + adaptive threshold; follow with light compression |
Protecting Your Equipment from Signal Damage
A loud, distorted file doesn’t just sound bad—it can burn out tweeters and preamps. Playing back clipped audio at high volume can physically damage speakers, guitar amps, and sensitive mic preamps.
I watch my gain and monitor the incoming signal so the system never sees extreme peaks. High-frequency distortion in an overloaded audio signal raises voltage and can cause overheating.
Keep levels and volume conservative during playback and recording. I check my software settings and my chain to ensure no device is sending an overloaded signal to monitors or speakers.
I also use a limiter as a hardware or software safeguard. A gentle compressor and a limiter protect gear by taming extreme peaks in music or vocals.
“A soft ceiling saves speakers and keeps your takes usable.”
- Playing damaged files back loud can harm tweeters, woofers, and preamps.
- Overheating from distorted frequencies is a real risk for pro setups.
- Use conservative gain, check software routing, and add a limiter to guard the chain.
| Risk | Why it matters | Quick setting |
|---|---|---|
| Clipped audio playback | Can physically damage speakers and amps | Lower monitor volume; inspect source file |
| Overheated drivers | High-frequency distortion raises voltage and heat | Limit peaks with a hardware limiter |
| Overloaded preamps | Distortion ruins vocals and can stress circuits | Set gain lower; use a -6 to -3 dB safety margin |
| Bad software routing | An overloaded incoming signal can bypass protection | Check routing and plugin settings before playback |
Conclusion
Finally, a few simple steps will keep your sessions efficient and your tracks sounding clean.
I hope this guide gives you practical information to keep your recordings high in quality and trouble-free. Take the time to set your microphone and gain so each track sounds professional from the start.
Use the right tools, test levels, and keep a low safety track. If you need to fix audio clipping, pick focused repairs and a smart workflow to save time and headaches.
Experiment with these techniques. I want you to make yourself heard with clear, crisp, distortion-free sound every time.
FAQ
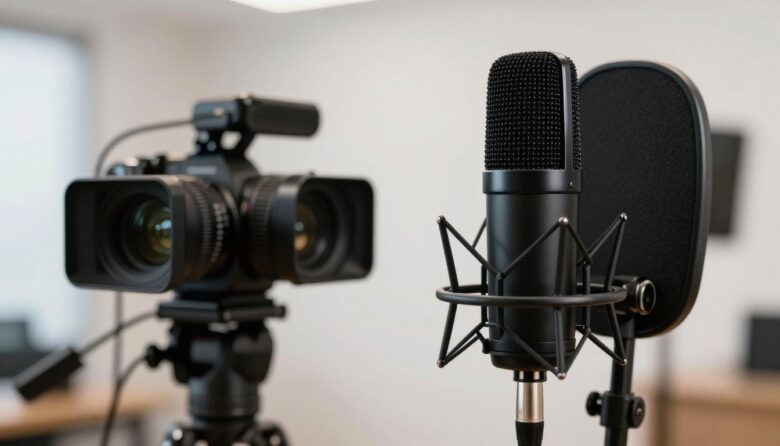
How do I set gain on an on-camera mic to avoid clipping?
I start by lowering the preamp gain until the loudest spoken peaks sit around -12 dBFS on my recorder or camera meter. I watch the level meters while doing a few test lines and keep peaks well below 0 dBFS so the signal never distorts. If my device has a pad or low-cut filter, I engage those for very loud sources to give extra headroom.
What does a waveform show and why does it matter?
I look at the waveform to see peak height and dynamic range. Tall, flat tops mean the signal hit the maximum level and clipped. A healthy waveform has rounded peaks and visible room between loud and soft parts. That visual helps me adjust gain and mic position before I record the final take.
How does overdrive affect my recordings?
Overdrive occurs when input stages hit their limit and produce harmonic distortion. I notice harshness, loss of clarity, and irreversible flattened peaks. Once footage is distorted at the input, restoration tools can only partially recover natural timbre, so I prefer to catch it during tracking.
What steps do I take during a test recording?
I run several tests at typical performance levels and push a bit louder to simulate transients. I watch meters and listen with closed-back headphones. If I see any red or hear harsher tones, I reduce gain, move the mic, or add a pad. I save a short reference clip so I can compare later.
How can I maintain consistent microphone distance while filming?
I mark floor spots or use a small boom to hold a fixed distance. For run-and-gun shoots, I train talent to keep their head position steady and use lavalier placement on the chest for consistent capture. Consistent distance avoids sudden level jumps that push the signal into distortion.
Why should I record backup tracks and which ones do I use?
I always record a safety track with 6–12 dB lower gain or a separate recorder with independent input levels. I also sometimes record a lavalier and the on-camera mic simultaneously. If the main track overloads, the backup often saves the take with clean peaks.
What tools help me manage signal levels on set?
I rely on accurate level meters, headphone monitoring, inline pads, and portable limiters. For cameras, I prefer units with visual peaking indicators. Software like Adobe Audition and hardware from Sound Devices or Zoom give reliable metering and control for clean capture.
Can I fix clipped or distorted files after recording?
I use de-clipper plugins and restoration suites like iZotope RX to reduce the audible harshness and reconstruct waveform transients. Results vary: mild distortion cleans up well, but badly overloaded tracks often retain artifacts. I treat restoration as a last resort, not a substitute for proper tracking.
How does a de-clipper work and when should I use one?
A de-clipper estimates lost waveform peaks and reconstructs them using surrounding samples and spectral analysis. I reach for it when a take is important and the clipped portions are limited. I always compare restored audio to the backup to ensure natural tone.
What can I do to protect mics and preamps from damage due to strong signals?
I engage pads on microphones or mixers when dealing with loud sources like drums or wind, use high-quality pop filters and windshields, and avoid exposing capsules to extreme SPLs. Good gain staging and keeping preamps below their maximum input prevent long-term stress on electronics.
Which settings work as a general starting point for vocals?
I begin with the preamp so peaks average around -18 dBFS and hit -12 dBFS on louder lines. I use a high-pass filter at 80–120 Hz to remove rumble and add a soft limiter if unexpected spikes are common. From there I tweak per voice and mic choice.
How do compressors and limiters help during recording?
I use a gentle compressor to tame dynamics when performers vary widely, and a limiter as a safety net to catch extreme transients. On-camera gear often benefits from a light setting so the mic still sounds natural but avoids sudden overloads that push levels into distortion.
What are common signs that my recording is about to clip?
I see meters hitting the top and occasionally flashing red, hear harshness or brittle highs in headphones, or spot flat-topped waveform peaks in my recorder display. If any of those appear, I reduce gain or change mic placement immediately.
Which brands and products do I trust for reliable level control?
I often use Rode and Sennheiser microphones, Zoom and Sound Devices recorders, and Apogee or Focusrite interfaces. For software, iZotope RX and Adobe Audition are my go-to tools for diagnosis and repair. These brands give consistent meters and durable preamps that help me avoid signal issues.

Caleb Hayes is a field recording specialist and audio technology writer focused on shotgun microphones, sound directionality, and on-location capture. He shares practical techniques and gear insights to help creators record clean, focused audio in real-world environments, from filmmaking to documentary production.